ADVERTISEMENT
1. Prepare the Caramel
Step 1: Melt the Sugar
In a saucepan, melt 250g of sugar over medium heat. Stir occasionally until the sugar turns into a golden caramel. This process requires careful attention to prevent the sugar from burning.
Step 2: Add the Butter
Add 65g of butter to the caramel and stir until it melts and combines with the caramel.
Step 3: Add the Cream
Slowly pour in 200ml of cream while stirring continuously until the mixture is smooth and well combined. Be cautious as the mixture will bubble up.
Remove from heat and let it cool slightly while you prepare the chocolate shells.
2. Prepare the Chocolate Shells
Step 4: Melt the Chocolate
Melt 160g of chocolate using a double boiler method: Place the chocolate in a heatproof bowl over a pot of simmering water, ensuring the bowl does not touch the water. Alternatively, melt the chocolate in the microwave in short bursts, stirring in between to prevent overheating.
Step 5: Add Sunflower Oil
Once the chocolate is melted, add 30g of sunflower oil and mix well to achieve a smooth, glossy consistency.
3. Assemble the Domes
Step 6: Create the Chocolate Shells
Using a silicone dome mold, spoon a layer of melted chocolate into each cavity, ensuring to coat the sides evenly.
Place the mold in the fridge to set for about 10-15 minutes.
Step 7: Fill the Domes
Once the chocolate shells have set, add a spoonful of the caramel mixture into each dome.
Sprinkle the chopped nuts over the caramel to add a delightful crunch.
4. Seal the Domes
Step 8: Add More Chocolate
Spoon additional melted chocolate over the caramel and nuts to seal the domes.
Smooth out the chocolate to create an even base, ensuring no caramel or nuts are exposed.
Return the mold to the fridge to set completely, about 1-2 hours.
Tips for Success
Preventing Sugar Burn: While making caramel, ensure to stir frequently and keep the heat medium to prevent the sugar from burning.
Smooth Chocolate: Adding sunflower oil to the melted chocolate helps achieve a smoother consistency that coats the molds better.
Even Coating: Use a brush or the back of a spoon to evenly coat the silicone molds with chocolate.
Cooling Time: Allow the caramel to cool slightly before filling the chocolate shells to prevent melting the chocolate.
Storage Tips
Room Temperature: Store the chocolate domes in an airtight container at room temperature for up to 3 days.
Refrigeration: For longer storage, keep them in the fridge for up to a week. Ensure they are in an airtight container to prevent moisture from affecting the chocolate.
Freezing: You can freeze the domes for up to 2 months. Place them in a single layer on a baking sheet to freeze, then transfer to a freezer-safe bag. Thaw in the fridge before serving.
Possible Questions
1. Can I use a different type of chocolate?
Yes, you can use milk, dark, or white chocolate according to your preference. Adjust the sweetness of the caramel accordingly if you use sweeter chocolate.
2. Can I add different nuts or fillings?
Absolutely! Feel free to experiment with different nuts, dried fruits, or even a dollop of peanut butter.
3. What if I don’t have a silicone mold?
You can use any small mold or even cupcake liners. Just ensure they are non-stick or lined with parchment paper.
4. How do I prevent the chocolate from cracking?
Ensure the caramel is not too hot when filling the chocolate shells, and allow adequate time for the chocolate to set properly in the fridge.
Conclusion
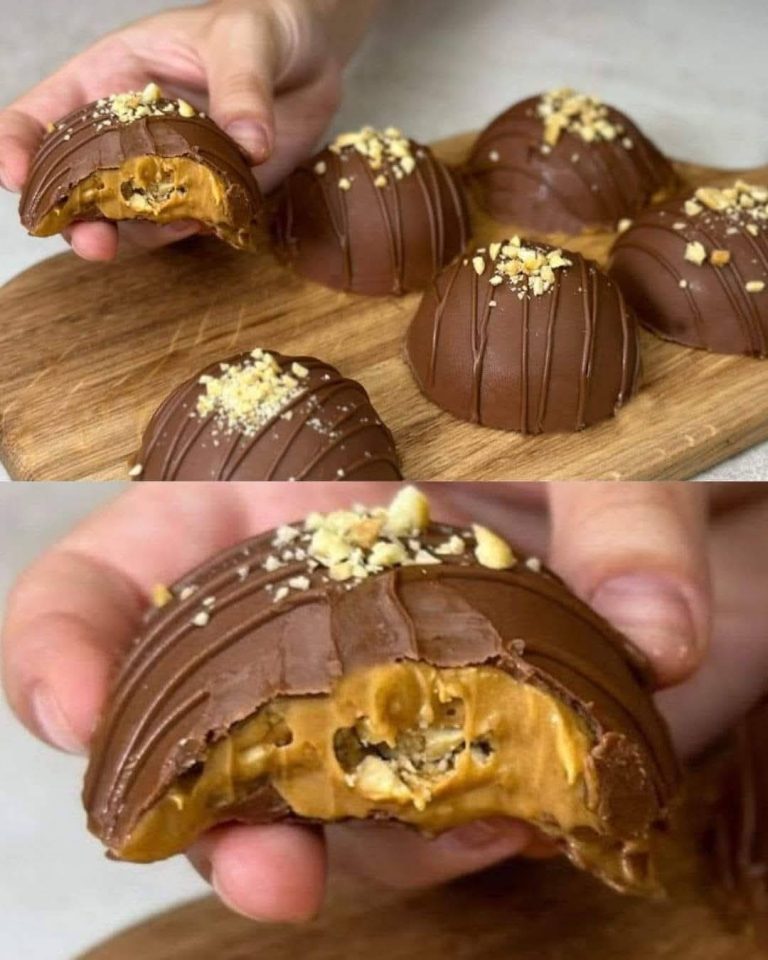
Enjoy your delightful homemade caramel-filled chocolate domes, perfect for sharing with friends and family or indulging on your own!
ADVERTISEMENT
